
Plenty of online resources exist, which you can use and equipment you can train with, to teach yourself basic Kickboxing techniques.
However, be mindful that learning on your own can never turn you into a proficient competitive fighter.
Learning Kickboxing on your own can, at best, give you a basic idea of form and required fitness level. However, to be a proficient and competitive fighter, you need expert instructor feedback and be able to hone your skills against a live opponent.
It is very important to decide what you want from learning to kickbox. If you want to be a competitive ring fighter, you best find a gym with a good instructor and skilled opponents to spar against.
If you are more interested in fitness and have no desire to fight, then learning on your own is ok.
Steps To Successful Kickboxing
- Get help from a proficient fighter
- Kickboxing training space
- Equipment needed to practice kickboxing
- Kickboxing stance
- Kickboxing footwork practice
- Practice throwing basic punches
- Opponent visualization and shadowboxing mirror work
- Practice defenses against punches
- Practice three basic kicks
- Five common punch-kick combinations
- Shadow kickboxing vs heavy bag work
- Exercises that increase your punching power
-> Also Read: How To Teach Yourself Boxing: The Complete Guide
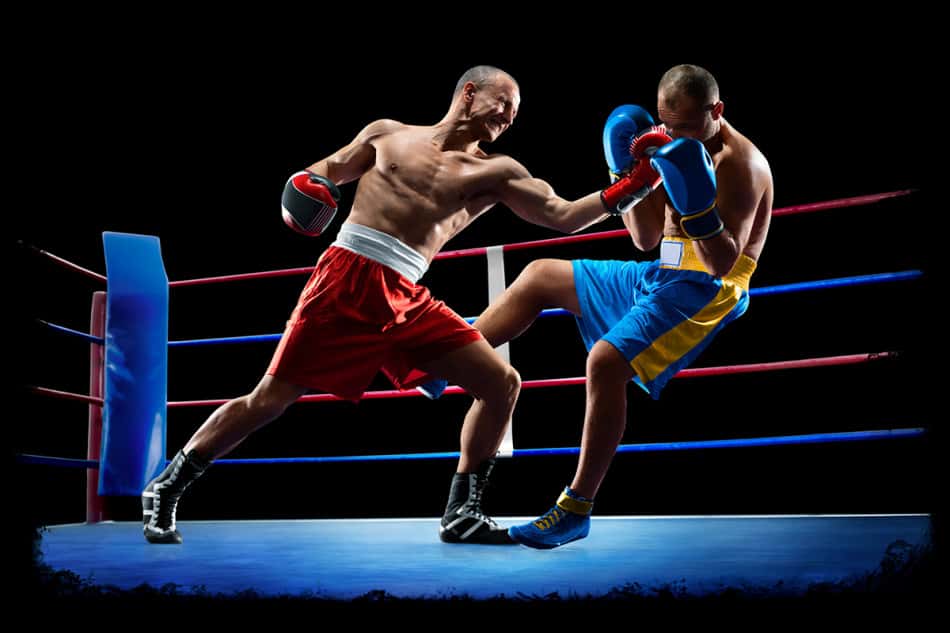
1. Why You Cannot Learn Fighting Proficiency On Your Own
To become a proficient fighter, you need to learn timing and the real-life effectiveness of your technique. For this, you need a real-time sparing partner and expert instructor feedback.
You need a resisting partner to gauge the force, speed, and accuracy required to execute your learned moves on a live opponent.
You need the experience of being hit back and fighting against a skilled opponent trying to win to develop a competitive fighter’s tough combat mindset.
For sparing sessions to be conducted safely, they should only take place under the supervision of a skilled instructor. Trying what you learned on friends and family in an unsupervised or undisciplined setting can lead to serious injury.
Online classes are insufficient to provide the required training realism and are very limited by camera angles and view.
Once you have decided to learn on your own, you will need an obstruction-free training space, hand wraps, boxing gloves, a punching bag, a wall mirror, a medicine ball, a list of punch–kick combinations to practice, and a Wi-Fi connection, to access online training videos and learn from the best.
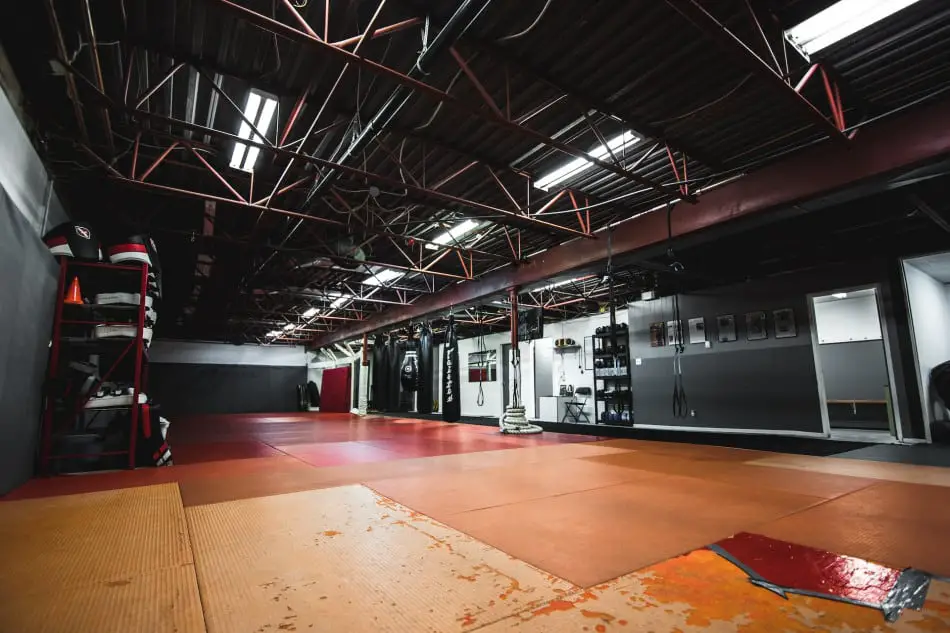
2. Kickboxing Training Space
Training alone, without the benefit of feedback from expert instructors and sparing opponents, you will need to maximize the benefits obtained from shadow kickboxing, heavy punch bag training, core strength, power, and fitness training.
To train, you will need a large obstruction-free space where you can practice kicks and punches without accidentally hitting furniture.
The floor you practice on should be flat, smooth, and dry to avoid ankle sprain or slipping. When kicking the heavy bag, do it barefoot to avoid damaging the bag’s leather finish.
If you are not used to walking or running barefoot, make sure the floor is not rough and hard to avoid blisters. It is advisable to train on not too hard a surface, in case of a fall, such as on grass or a mat.
3. Equipment Needed To Practice Kickboxing
It is advisable to invest in the following equipment:
- A long wall mirror monitors your stance, posture, punches, and kicks when shadow kickboxing.
- A medicine ball to help you to increase your punching power
- A suspended heavy bag offers resistance to your kicks and punches, helping you build kicking and punching power and condition your wrists and fists.
- Boxer hand wraps are needed to avoid spraining your wrists when punching the heavy bag.
- Boxing gloves are needed to avoid bruising and hurting your hands when punching the bag, giving you the freedom to punch at full power.
- A piece of floor tape to help you guide your stance and footwork
- Wi-Fi lets you download good-quality instructional YouTube videos and study the moves of the best kickboxers.
- Floor Tape: To help with stances and footwork.
4. Practice Your Kickboxing Stance
First, learn how to remain stable, to make it harder for an opponent to knock you over so that you don’t topple over while kicking and punching.
Stick some tape on the floor. Stand feet apart with the floor tape running between your feet. This ensures that your right and left feet stay on the right and left sides. It is a cardinal sin to cross your feet when Kickboxing, as this makes you unstable.
Pigeon toe in on the ball of the back foot and hold your arms up straight, perpendicular to the floor, elbows tucked in close to your body, protecting your ribs.
Your hands should be staggered. If you are an orthodox fighter, your dominant right hand should be further to your rear relative to your left hand, mirroring your right foot, which is at the back.
You may want to test the stability of your stance by gently swinging your bag and standing directly in its line of swing and see if it knocks you over.
Practice with the bag hitting you from the side and the front. It should not knock you over if you are in the correct stance.
Also, you may practice standing in the bag’s line of swing and having it miss you by making the smallest movement possible.
These avoidance movements should be executed by bending your waist and rotating on your feet’ balls.
5. Kickboxing Footwork Practice
Start in a neutral stance, feet apart. If you are right-handed, move your left foot forward. This makes you an orthodox fighter. If you are left-handed, move your right foot forward.
This makes you a South Paw in boxing jargon. Your feet are now at shoulder width and staggered. Your front toe points straight ahead at 12 o’clock, and your back foot points 90 degrees to the side.
Practice moving forward and backward without breaking this stance. Let the floor tape guide you. Keep in mind that to keep this stance and to maintain the same distance between your feet as you move forward and back, you cannot walk.
To maintain your staggered foot position and front foot, you must shuffle with your knees slightly bent.
Do not shuffle flat-footed. To keep nimble, raise your heels slightly to shuffle more on the balls of your feet. Practice moving a few meters backward and forwards in one smooth movement without dropping your guard. Next, practice shuffling to the side, left and right.
Mix it up until you can maintain your stance, smoothly transition from the back, forward, right, and left, and move in a circle without your feet maintaining equal distance and always maintaining contact with the ground.
6. Practice To Throw Basic Punches
Once you have mastered keeping the correct stance while shuffling, keeping your guard up, maintaining foot-ground contact and stability at all times, it is time to practice throwing punches in between shuffling.
Form your hands into a fist. Make sure your fist is square so your knuckles and fingers are tight and flat and your thumb tucked down.
Protruding knuckles or fingers can get sprained or hurt. Keep your wrists firm. Punching with limp wrists will get them sprained. Your fists should be kept at cheek level. Hold your chin tucked in and keep your eyes on your opponent through your hand guard at all times.
It is important to remember that to have maximum power behind punches; both feet must be in contact with the ground. Therefore, never punch amid a shuffle, only in between shuffles.
Also, remember that punching power emanates largely from the correct rotation of hips and swiveling on the balls of your feet.
Never connect your punch with your arm fully extended to avoid elbow sprain. Always end your punches with a slight bend in the elbow.
When punching with one hand, never let your guard down with the other.
The 4 basic punches to master are:
- Jab: This punch is thrown with the weaker, less dominant lead hand from the guard hand position. Power is generated from stepping into the punch, rotating the hips, then the torso, shoulder, and wrist just before striking. Jabs are not used to deliver knock-out blows. They are mainly used to keep opponents at a distance and distracted before delivering knock-out blows.
- Cross: This punch is thrown from the guard by the dominant rear hand. It is called the cross because rotating the torso brings the hand forward from the rear and crosses the body. The cross is more potent than the jab and is used as a knock-out punch.
- Hook: Instead of punching directly and straight to the head, this punch is thrown in a semicircle and connects the opponent’s head from the side. From the guard, drop your arm 90 degrees inwards without dropping your shoulder, and simultaneously twist your torso and pivot on your toes.
- Upper-Cut: From the guard, lower your shoulder by bending your knee, propel your body forward and upwards, and extend your fist towards the chin.
Practice these punches one at a time in front of a mirror. When looking at the mirror, see that you don’t drop your guard when punching.
Also, check that your jabs and crosses should be delivered along a horizontal plane so that your fist connects with your opponent squarely and not at an angle.
Once you have perfected each punch, you should start practicing combinations of 1,2 and 1, 2, and 3 punches. Good fighters, never throw just a single punch at a time.
Punches are more effective when they come in 2’s, 3’s, and even 4’s combinations. Normally you open with a jab to distract the opponent and gauge distance, then follow up with a cross.
The first combinations you may want to start off with are as follows:
- Jab – Cross
- Jab – Jab – Cross
- Jab – Cross – Hook
- Jab – Cross- Hook – Uppercut
Remember that you are not standing still while delivering punch combinations in a real fight. After delivering a combination shuffle, put up your guard stop, deliver your next combination, return to guard, shuffle left or right, backward or forwards and repeat.
It’s best not to shuffle too many times in a straight, predictable line, backward or forwards.

7. Opponent Visualization And Shadowboxing Mirror Work
It’s always best to move in a circle around your opponent by moving to the outside of their punch. When shadow boxing, try to visualize your opponent in front of you.
Imagine them striking at you with their left and shuffling around their left side, out of reach from their follow-up, right punch. Do not move right into their follow-up punch.
Continuously moving to the outer side of their punches forces your opponent to readjust their stance to face you squarely.
Practice these combinations in front of the mirror. As you throw punches, see which parts of your body are exposed.
As you throw a left hook, is your right guard up? Think like your opponent; which exposed parts of your body would you go for?
8. Practice Defenses Against Punches
When throwing punches, imagine the opponent is counter-punching and think of how to avoid those.
As you throw a left jab, the opponent may step to your left, outside your punch, and counter with a right hook (their right, targeting the left side of your head).
You may defend yourself by:
- Ducking: by bending your knees and crouching down while keeping your eyes on your opponent, never look down on the floor and lose sight of the opponent.
- This should be a minimal movement to conserve energy. Ideally, your duck should be shallow so that your opponent’s hook scrapes the top of your hair.
- Move up your left elbow and bent forearm to cover the left side of your head. Since you have already committed your left hand to a jab, timing is of the essence. Time would be more on your side if the opponent countered with a left hook targeting your right temple.
By making the mistake of stepping into your right guard, you can counter their hook by punching them into their left shoulder, neutralizing their hook, and showing that a counter-punch can also be used as a defensive block.
In this case, the elbow-forearm block will be quicker and easier to do with your uncommitted right arm.
Defenses against your opponent’s jabs and crosses may include:
- Parry Block: Hit down onto your opponent’s forearms or wrists, deflecting their punch.
- The Front Forearm Cage: Hold both forearms together in front of your head, protecting the face
- Stepping Back Out Of Range
You can defend against strikes to your ribs and stomach by tucking your elbows close to your sides and rotating your hips so that your elbows block the incoming punches.
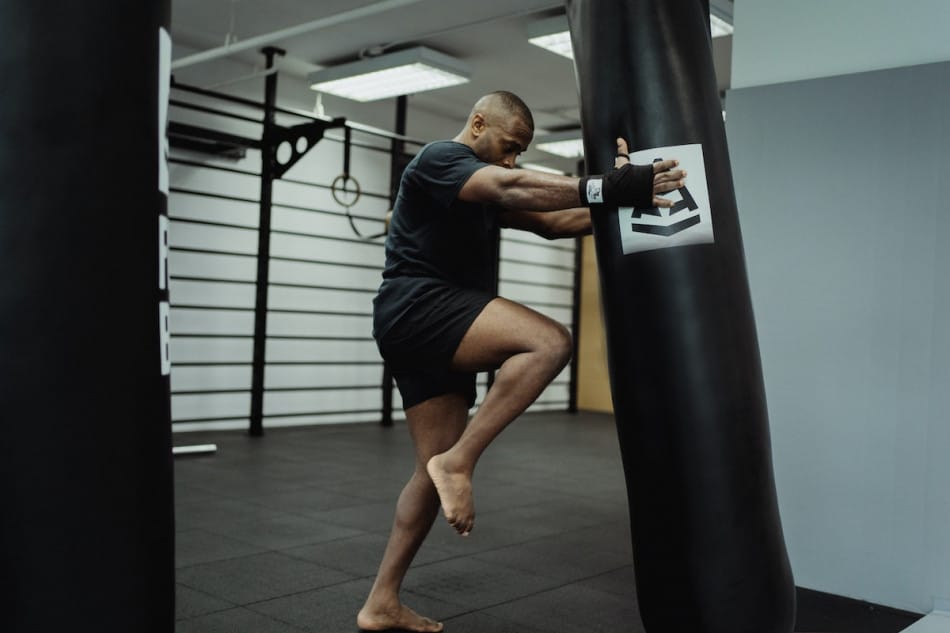
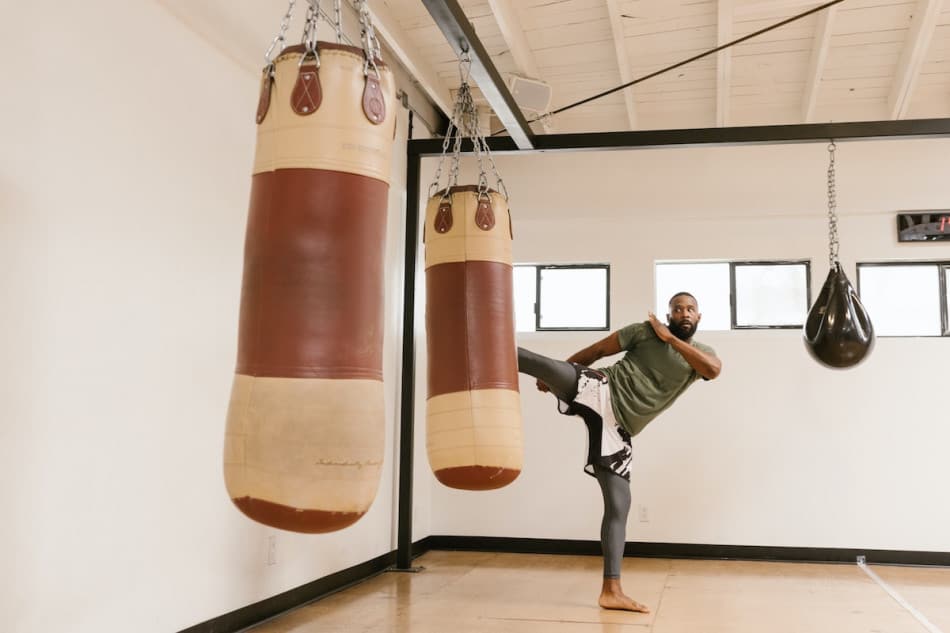
9. Practice 3 Basic Kicks
The 3 most basic kicks to master in Kickboxing are:
- Front Push Kick: Without dropping your guard, shift your weight onto your back leg, and raise your front leg vertically before snapping it straight while thrusting forward with your pelvis. A kick in the solar plexus is effective in stopping an opponent from rushing forward into your space.
- Roundhouse Kick: Lift your knee, pivot your supporting foot 90 degrees, turn your body in a semicircular motion, snap your leg, and strike with your lower shin. A low kick can be used to deaden an opponent’s outer thigh muscle. If you kick the inner thigh, it is called an inside leg kick.
- Side kick: Face your opponent sideways. Your kicking leg will be the leg nearest your opponent.
To maintain stability and control the side kick, bring your knee to your chest and quickly snap your leg out. Strike your opponent with your heel and retract back quickly.
10. Practice 5 Common Punch-Kick Combinations
These are the most widely used combinations in sparing and kickboxing competitions with orthodox fighters in mind:
- Jab — Cross — Left Hook — Low Kick
- Inside Kick — Cross — Left Hook — Right Body Kick
- Cross — Left Hook — Cross — Left Body Kick
- Double Jab — Cross — Left Body Shot — Low Kick
- Double Jab — Right Hook — Left Kick — Left Kick
-> Learn More about Self-Learning vs. Classroom Learning: Which Is Better?
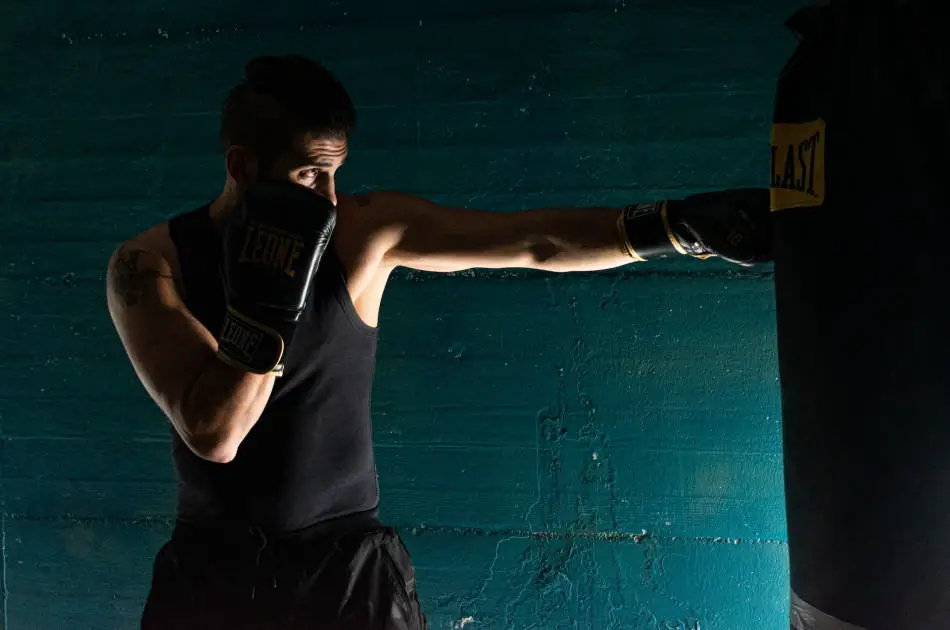
11. Shadow Kickboxing VS Heavy Bag Work
Shadow kickboxing and heavy bag work are not mutually exclusive. Instead, both are necessary and complementary to each other.
Shadow kickboxing in front of the mirror polishes your form and technique. Since there is no resistance to your kicks and punches, you can go through many combination routines without getting too tired.
The point behind heavy bag training is the resistance that it offers. The aim is to have a full-force intensity workout to develop your kicking and punching power and stamina.
Throw your combinations at the bag for 10-second intervals and hit as hard as you can.
After 10 seconds, do an easy session of footwork and light jabs for 10-15 seconds. Then go hard for another 10 seconds. Do this for a couple of three-minute rounds, resting for a minute or so in between rounds.
Ensure you pay close attention to technique because the proper technique will ensure you throw your punches with optimal force.
12. Exercises That Increase Your Punching Power
There are 2 further drills you can incorporate into your training that will increase your punching power and explosiveness:
- Medicine Ball Throw: Lie on your back, holding a heavy medicine ball with both hands. Throw the ball as high as you can by pushing from your chest. Catch and repeat. Hold a medium-weight medicine ball while in your fighting stance. Place the ball into the palm of one hand and push it as hard as you can against a wall. Do this as if you were throwing a punch.
- Plyometric Push-Ups: Plyometric training is sometimes called “jump training .”These exercises engage your muscles in short bursts of maximum effort, increasing power and speed in time. To do plyometric push-ups, dip down like in a standard push-up, but explode back up by lifting your hands off the ground.
This trains shoulder, pectoral, and arm strength — increasing your punching power. You may also clap your hands in mid-air or against your chest.
Concentrate on keeping your glutes and core tight. Later try lifting your feet off the ground along with your hands. Over time this will make you super explosive in a fight.
-> Learn more about the 7 best websites for self-learning
Final Thoughts
Learning alone is insufficient if you desire to be a competitive ring fighter. Having said this, even in an instructor’s gym, trainees perform solo exercises such as shadow boxing and heavy bag punching, which can be practiced on your own.
The chief drawback to training on your own is that you will not receive feedback and correction from an expert instructor.
You will not be able to test your skills against a live sparring partner and an opponent trying to beat you.
This is ok if you do not desire to fight and learn purely for fun and fitness.
References
- https://evolve-mma.com/blog/4-drills-that-will-increase-your-punching-power/
- https://fightquality.com/2019/02/11/5-kickboxing-combos/
- https://sweetscienceoffighting.com/how-to-block-a-punch/
- https://sandovalkarate.com/the-four-main-types-of-punches-jab-cross-hook-uppercut/
- https://www.howcast.com/videos/510164-how-to-do-stances-kickboxing-lessons